Garlic Parmesan Biscuits

About this recipe
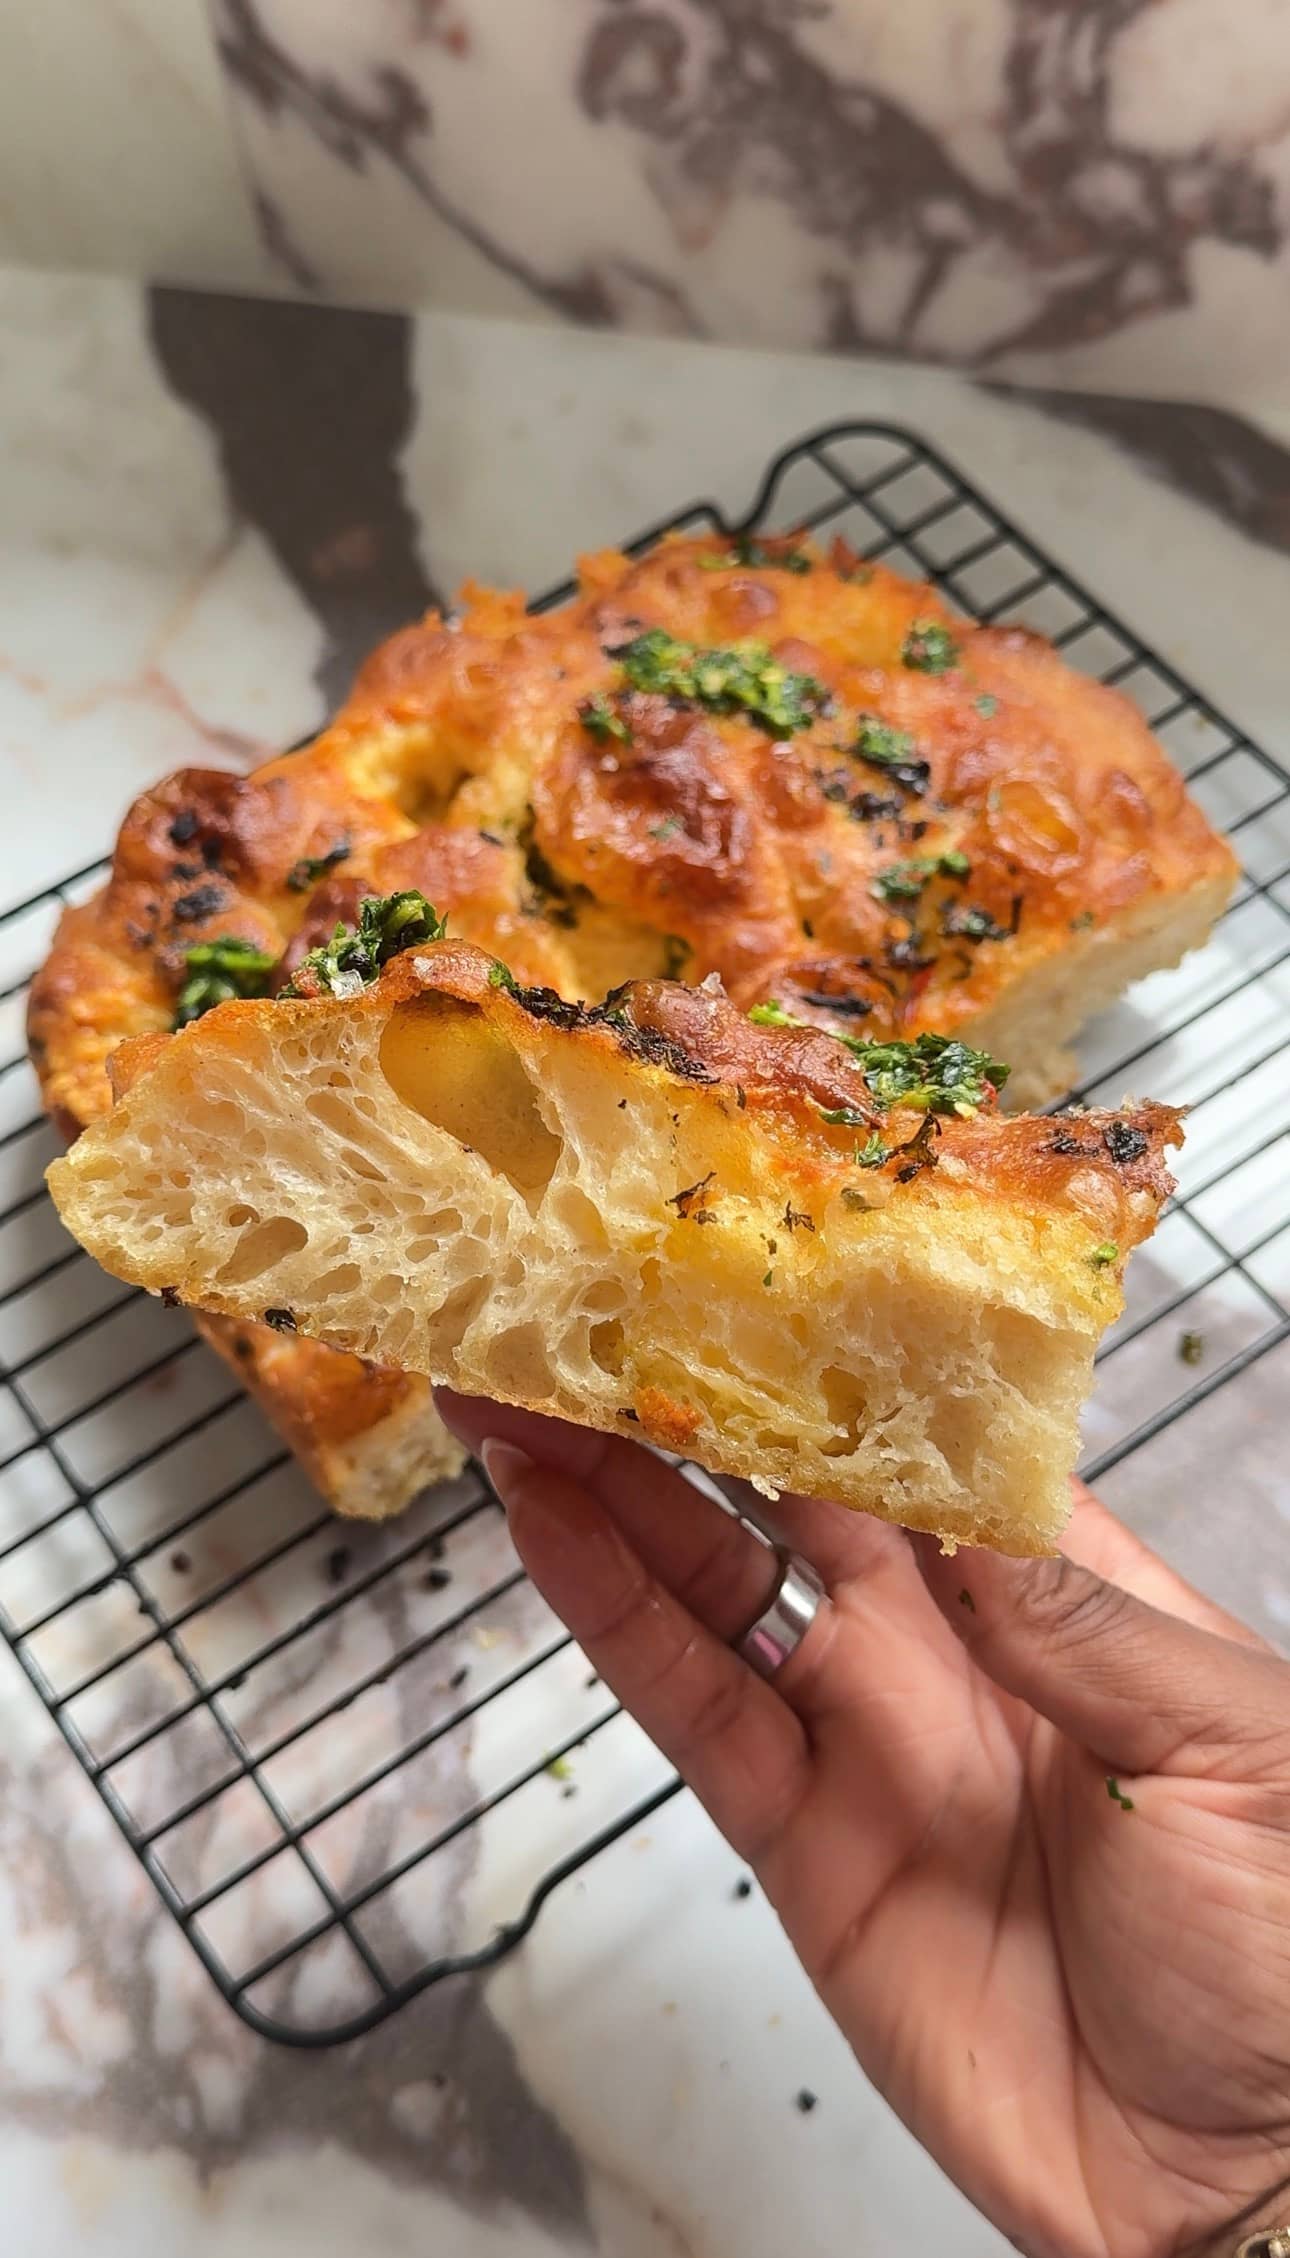
Flaky, buttery, and packed with allll the flavour, these Garlic Parmesan Biscuits are about to become your new favourite bake. When I pulled out a tray of these out of the oven, the buttery layers, specks of vibrant green chives, and the irresistible aroma of garlic parmesan started filling my kitchen. They’re the kind of baked good that feels like it came straight from a bakery but is VERY achievable at home!
These biscuits are perfect for almost any occasion. Serve them at brunch with cheesy scrambled eggs, pair them with a comforting bowl of soup, or simply enjoy one warm with a generous smear of butter (kerrygold of course). They’re versatile, impressive, and incredibly moreish — you might just find yourself sneaking one (or three) while they’re still cooling.
American Biscuits vs. British Scones
Before we dive in, let’s address the question that always pops up: “Aren’t biscuits just scones?”
The short answer? Absolutely not.
While they may look a little similar, American biscuits and British scones are two very different things.
- American biscuits are light, airy, and full of flaky layers. They’re tender in the centre, buttery throughout, and often used as a side dish rather than a sweet treat.
- British scones, on the other hand, are denser and more cake-like. They’re usually slightly sweetened and served with jam and cream rather than alongside savoury meals.
Think of it like this: a scone is something you have with tea, while a biscuit is something you want with fried chicken, stew, or a big bowl of chilli. And in this recipe, the garlic parmesean firmly plant these biscuits in the savoury, American-style camp.
The Secret to Flaky Biscuits: Cold Butter
The number one rule when it comes to making biscuits is this: your butter must be cold.
Why? Because cold butter is the key to creating those irresistible flaky layers. When you mix cold butter into flour, you end up with tiny chunks of fat scattered throughout the dough. As the biscuits bake, the butter melts and releases steam, which pushes the dough upward and outward. The result is those tall, pillowy biscuits with distinct layers that practically beg to be pulled apart.
If your butter is too warm, it will blend completely into the flour. This creates a uniform dough without those pockets of fat, leaving you with a dense, flat biscuit. So, keep your butter cold — straight from the fridge is perfect — when handling the butter make sure your hands are cold so you dont warm it up either.
Pro tip: Dice your butter into small cubes before you start, then pop it back in the fridge while you measure out your other ingredients. This ensures it stays extra cold until you’re ready to use it.
Gluten Development - (its not scary like it sounds)
Let’s talk about gluten — the protein that forms when flour and liquid are mixed together.
Gluten is great for breads because it gives them structure and chewiness. But for biscuits, we want the exact opposite. Too much gluten will make your biscuits tough and heavy, rather than light and fluffy.
The best way to prevent overdeveloping gluten is to mix gently and minimally.
- Once you add the buttermilk, stir only until the flour is just incorporated.
- It’s okay if there are a few small streaks of flour or lumps in the dough — those will sort themselves out as the biscuits bake.
The goal is to keep the inside tender and delicate while still holding everything together.
Laminating the Dough: Bakery-Style Layers
Here’s a little trick that takes your biscuits from homemade to bakery level: lamination.
You might associate lamination with croissants or puff pastry, but the concept works beautifully for biscuits too. It’s simple:
- Roll the dough into a rough rectangle.
- Cut it into three sections, then stack the pieces on top of each other.
- Gently press them back down and repeat this process two more times.
Each time you fold and stack, you’re building more distinct layers. When baked, these layers puff up and separate, creating that dreamy, pull-apart texture.
Bonus: The lamination also traps little pockets of Parmesan and chives throughout the dough, giving you a burst of flavour in every bite.
Once laminated, let the dough chill in the fridge for 30 minutes. This step is crucial — it keeps the butter firm and prevents it from melting too quickly in the oven. Cold butter equals maximum flakiness.
Make-Ahead and Freezing Tips
One of the best things about these biscuits is how well they freeze. After cutting the dough into squares, freeze them on a baking tray until solid. Then transfer them to a freezer bag or container, and they’ll keep for up to one month.
When you’re ready to bake, simply pop them straight into the oven from frozen — no thawing needed! Just add an extra 2-3 minutes to the bake time.
This makes them perfect for entertaining or for those nights when you want fresh biscuits without the effort.
FAQs
Can I use unsalted butter instead of salted?
Yes! Just add an extra ½ teaspoon of fine sea salt to the dry ingredients to balance the flavour.
How cold should the butter be?
Straight from the fridge — cool to the touch and firm. If your kitchen is warm, you can even chill it in the freezer for 5-10 minutes before using.
Why are my biscuits dense and not fluffy?
The two most common culprits are over-mixing and warm butter. Mix only until the dough comes together, and keep everything cold from start to finish.
Can I make the dough ahead of time?
Absolutely. Once shaped, cover the dough and refrigerate for up to 24 hours before baking. Or freeze the shaped biscuits and bake straight from frozen.
Do I have to laminate the dough?
Technically no, but it makes a huge difference. Those extra folds create visible, bakery-style layers that are well worth the extra few minutes of effort.
Serving Suggestions
These biscuits are incredible fresh out of the oven, but here are a few ways to enjoy them:
- Breakfast sandwich: Slice a warm biscuit in half and stuff it with scrambled eggs, crispy bacon, and cheese.
- Side for soups and stews: Perfect for dunking into rich, hearty dishes.
- Snack with butter: Sometimes simple is best — serve warm with salted butter or garlic butter.
- Fancy upgrade: Brush with melted butter and sprinkle with extra Parmesan and chives before serving.
Ingredients
- 170 g cold salted butter, diced into small cubes
- 425 g plain flour
- 1 tablespoon baking powder
- 1 teaspoon fine sea salt
- 1 teaspoon garlic granuels
- 30 g chives, finely sliced
- 100 g Parmesan cheese, finely grated
- 300 g buttermilk, cold
Ingredients
- 6 oz cold salted butter, diced into small cubes
- 15 oz plain flour
- 1 tablespoon baking powder
- 1 teaspoon fine sea salt
- 1 teaspoon garlic granuels
- 1 oz chives, finely sliced
- 3.5 oz Parmesan cheese, finely grated
- 10.5 oz cold buttermilk
Instructions
- Preheat the oven to 220 °C (425 °F). Line a baking sheet with parchment paper.
- Combine flour and butter. In a large mixing bowl, add the flour. Toss in the cold cubed butter and use a pastry cutter or your fingertips to work it into the flour until you have pea-sized bits.
- Add dry mix-ins. Stir in the baking powder, sea salt, chives, and Parmesan until evenly distributed.
- Add buttermilk. Pour the cold buttermilk over the mixture and gently stir until the dough just comes together. Avoid over-mixing — lumps are okay!Lamination step.
- Turn the dough out onto a lightly floured surface and pat it into a rectangle about 2 cm thick.
- Cut the dough into three even sections, stack them on top of each other, and press down gently.
- Repeat this folding and stacking two more times — this creates gorgeous layer
-
- Chill the dough. Wrap the dough tightly and refrigerate for 30 minutes. This rest keeps the butter firm and helps your biscuits puff up when baked.
- Shape and freeze. Roll the chilled dough into a 15 cm square, then cut into 8 equal squares. Place them on a parchment-lined tray and freeze for 10 minutes before baking.
- Bake. Just before baking, sprinkle the tops with a pinch of sea salt. Bake for 18-22 minutes, until golden brown and puffed.
- At this point, you can freeze them solid and store for up to 1 month.
- Cool and serve. Let the biscuits cool on the tray for 5 minutes before serving warm.

Hi, I'm Remi
Follow me on socials to stay connected!
Pin this Recipe
More like this


More recipes like this
Tempted by something else?


Work with me, or ask me a question!
I'm all about teaming up with cool new brands that align with my audience and make cooking awesome meals a breeze. Drop me a line, and let's cook up some exciting plans together!

Want free recipes and insider knowledge in your inbox?
Subscribe Below!