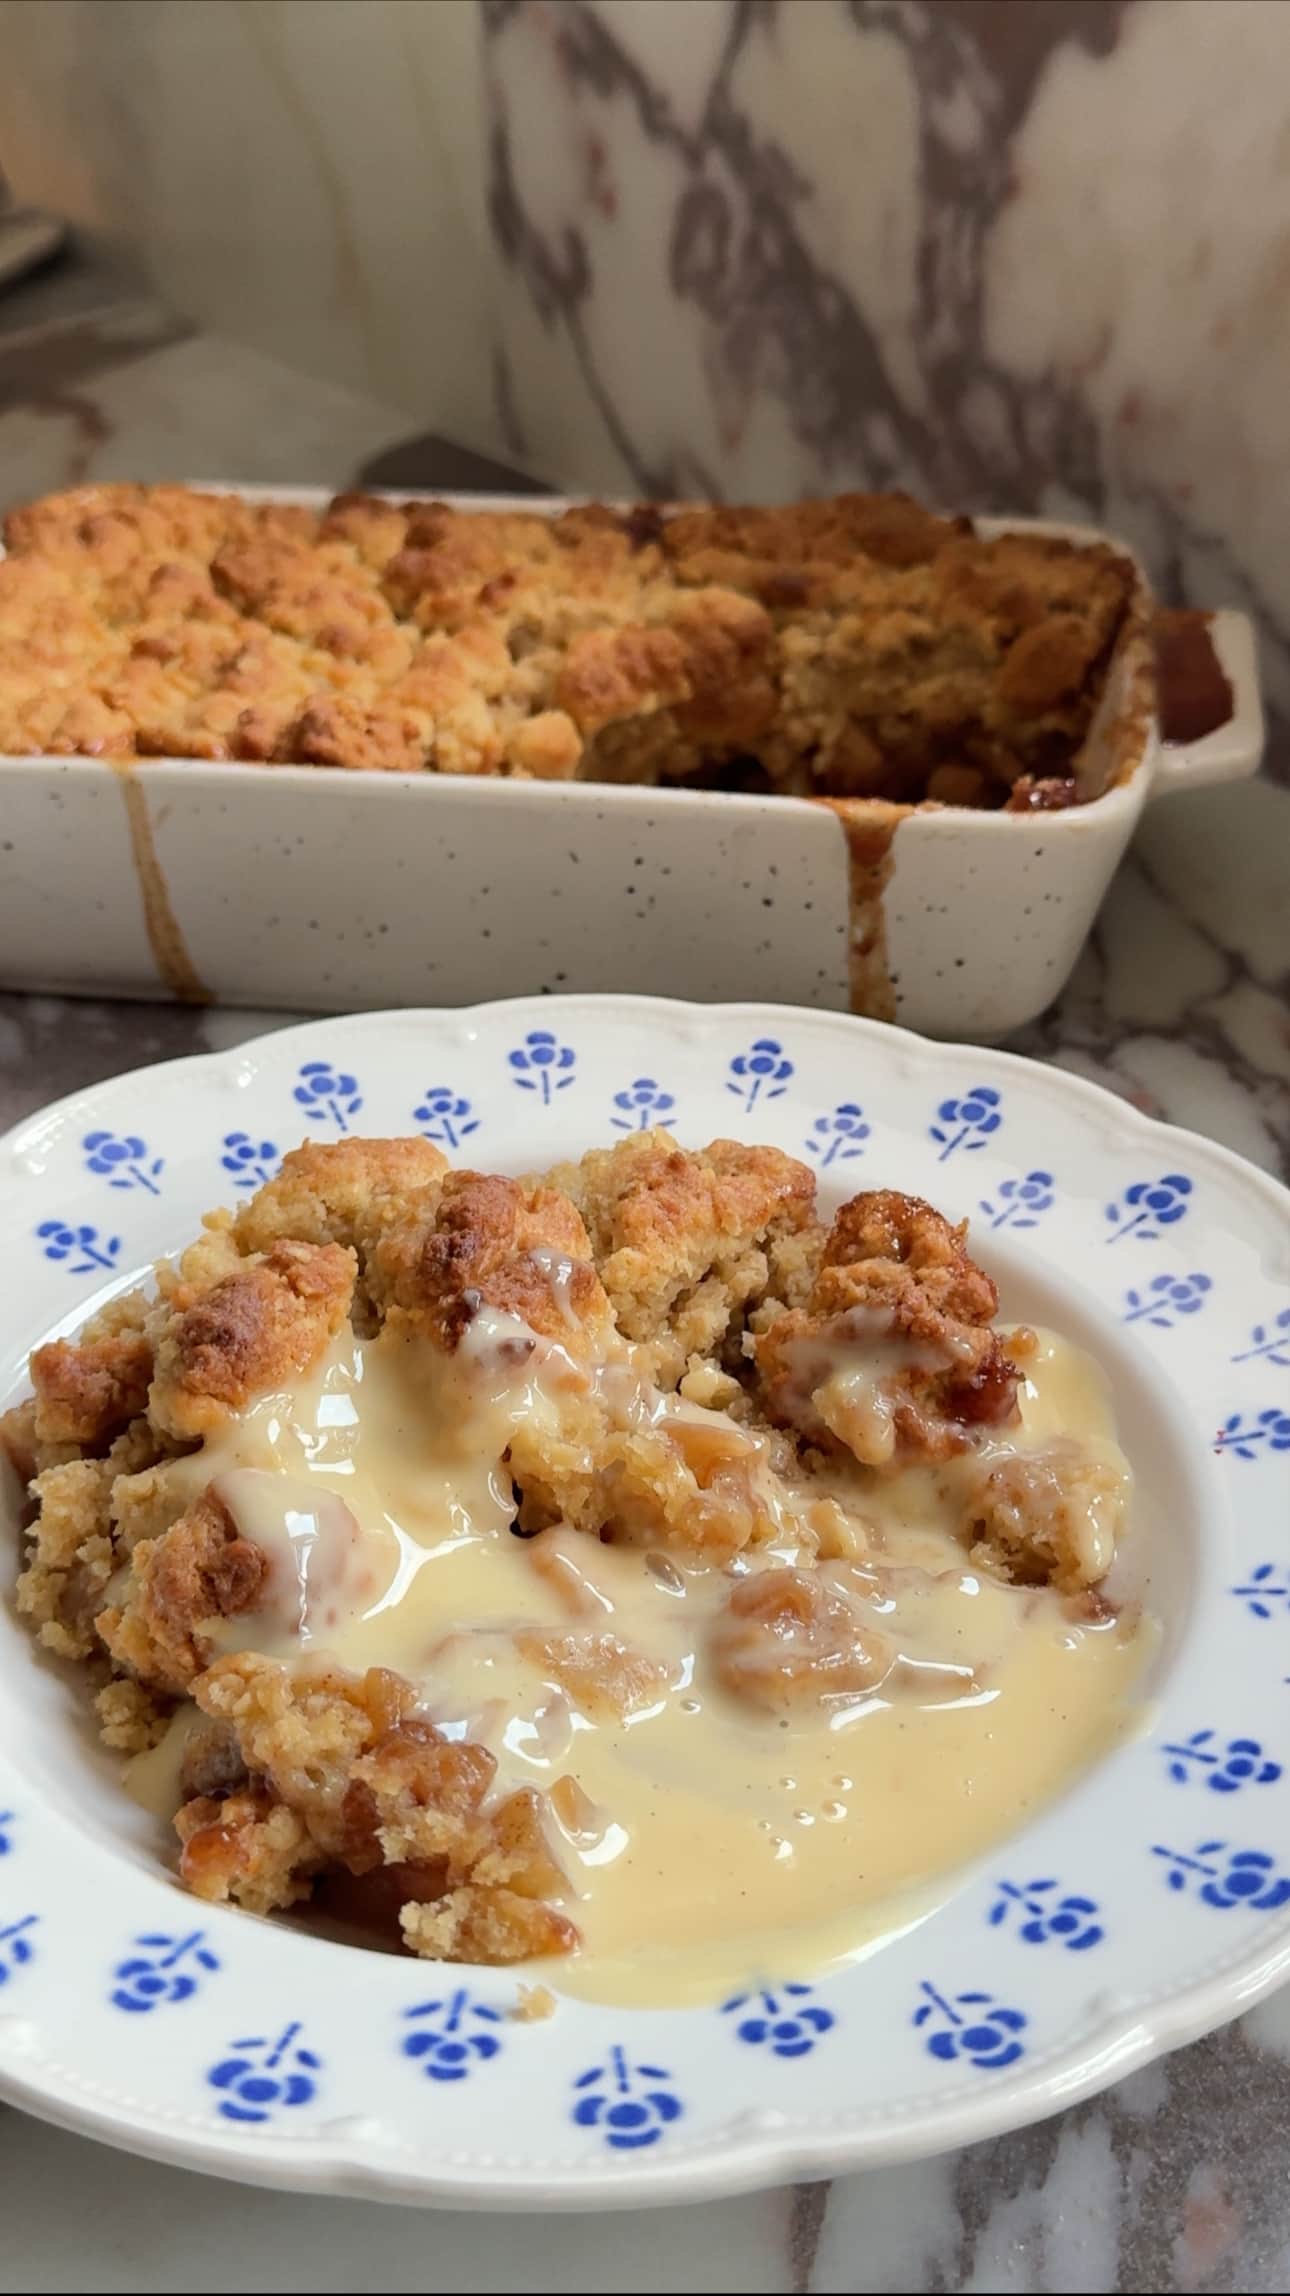
The Best Raspberry & White Chocolate Cheesecake

About this recipe
This is easily one of my most requested recipes ever. If you’ve followed me for a while you’ll know I’ve made a lot of desserts, but this baked cheesecake is one that people constantly ask for. Every time I post it I get messages asking for the full recipe, tips, or how to recreate it at home. So here it is, my famous baked cheesecake, finally written out properly for you.
Now I want to make something very clear from the start. This is not a no bake cheesecake. I know those are very popular online but if we’re being completely honest… I’m just not the biggest fan. I’ve made plenty of no bake cheesecakes over the years and while they can taste delicious, the texture is just never quite right for me.
A no bake cheesecake tends to be a little too soft, almost slightly wet in texture. Sometimes it feels more like a mousse or a thick cream rather than an actual cheesecake. And don’t get me wrong, there’s absolutely a place for them. But when I’m craving cheesecake, I want something firm, rich, creamy and sliceable.
That’s exactly what you get with a proper baked cheesecake.
When a cheesecake is baked, the eggs set the filling so you get that beautiful structure that still melts in your mouth. It’s rich, smooth and luxurious without feeling runny. You can cut a clean slice, the base stays crisp, and every bite feels like an actual dessert rather than something halfway between cream and cake.
Another reason I love baked cheesecakes is that they give you so much more freedom when it comes to flavour. With no bake cheesecakes you’re often limited to fairly basic combinations because you’re relying on whipped cream and cream cheese for structure. But when you bake a cheesecake you can experiment with different chocolates, fruit purées, flavourings and textures.
Which brings me nicely to this flavour combination.
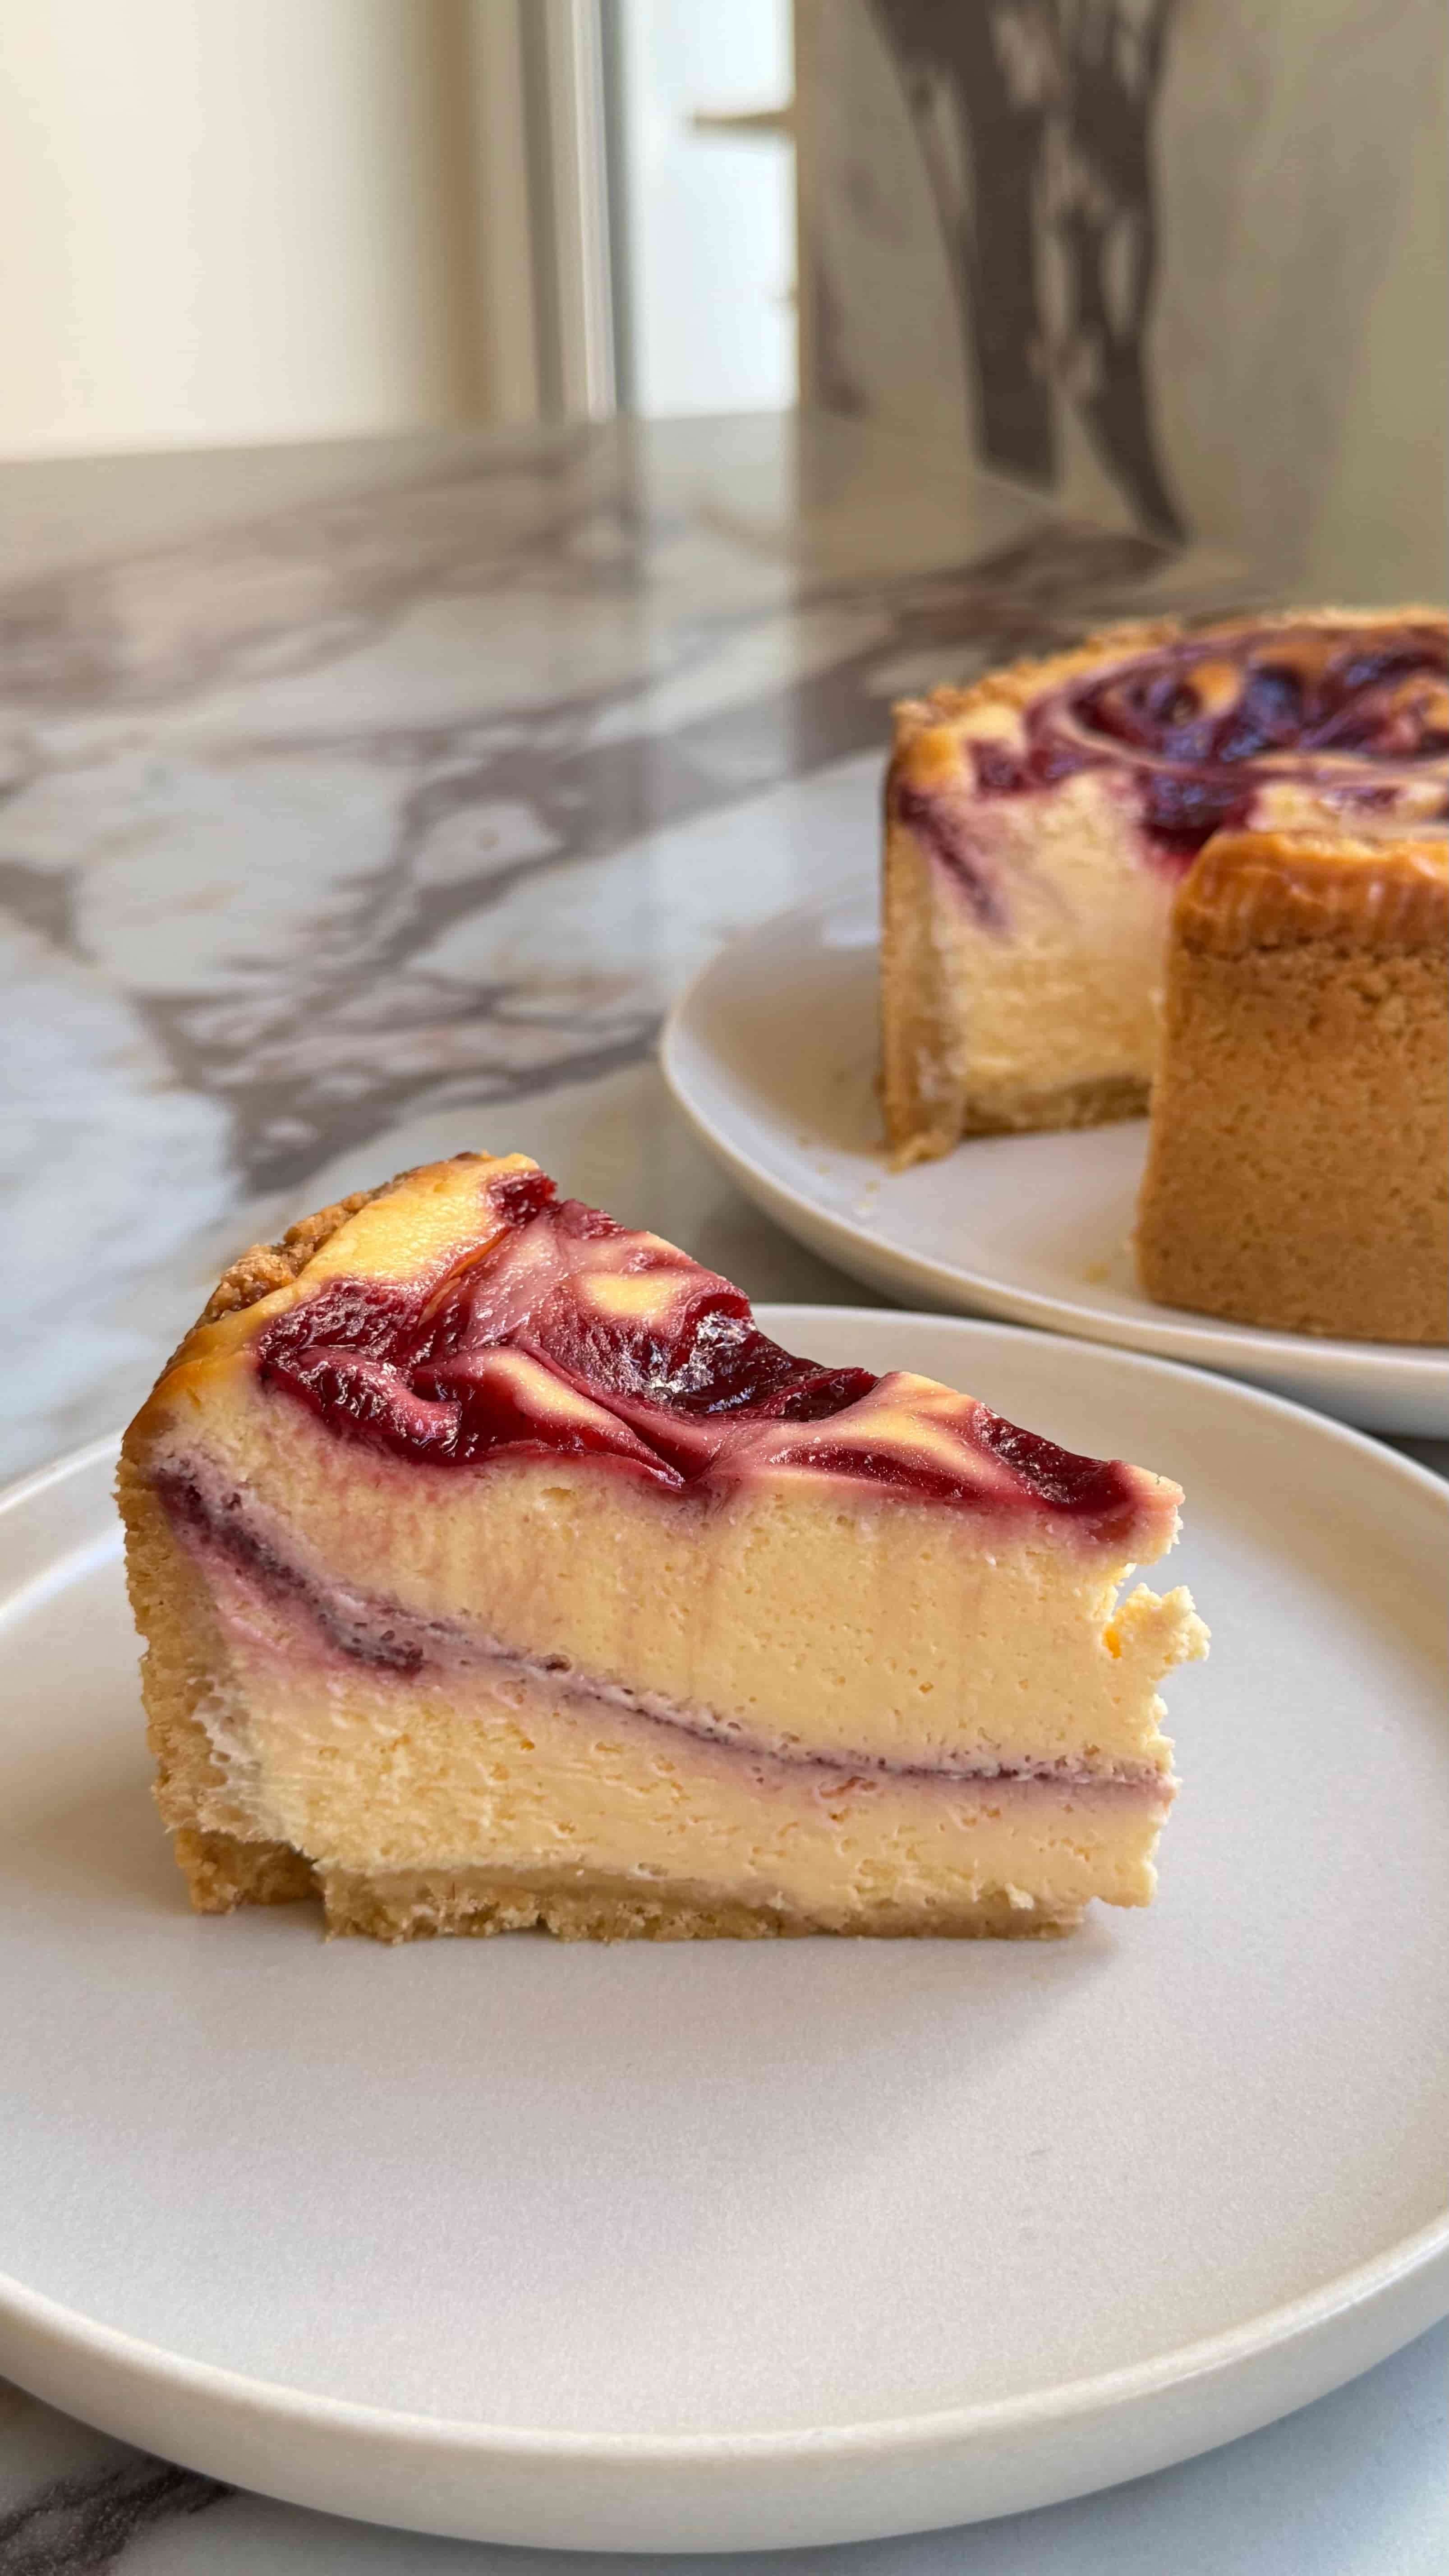
White chocolate and raspberry is honestly one of the best dessert pairings out there. The white chocolate brings sweetness and richness, while the raspberries add a sharp, slightly tart contrast that stops everything from becoming too heavy. It’s the kind of balance that makes you go back for another bite even when you’re already full.
And trust me, this cheesecake is rich.
This is the type of dessert where you cut a slice thinking “that’s a normal portion” and then halfway through eating it you realise you probably could have shared it. But in the best possible way. It’s decadent, creamy and deeply satisfying.
In fact, when I first made this cheesecake my sisters came over that evening and immediately declared it one of the best things I’ve ever made. Which is saying a lot considering how many desserts they’ve taste tested over the years.
What I also love about this recipe is how adaptable it is. While raspberry is my personal favourite, you can easily swap the fruit depending on what you have or what you’re craving. Blueberries work beautifully, strawberries are fantastic in the summer, and even cherries can be incredible if you want something a little deeper and richer
The base recipe stays exactly the same. All you’re really doing is switching the fruit element.
Now before we get into the baking process, there are a few key tips that make a huge difference when making cheesecake.
The first and most important one is to make sure all your ingredients are room temperature.
I know it can feel like an annoying extra step but it genuinely makes such a difference to the final texture. If your cream cheese, sour cream or eggs are cold, the batter can split or curdle when everything is mixed together. What we want is a smooth, silky cheesecake batter.
The easiest way to do this is simply leaving your ingredients out the night before if you know you’re making the cheesecake the next day. But if you forget (which happens to me all the time), there are a couple of quick tricks.
You can microwave the cream cheese and sour cream at around 400W in 30 second bursts until they reach room temperature. Just make sure you don’t overheat them.
For the eggs, simply place them in a bowl of warm water for about 10 minutes. That will gently bring them up to temperature without cooking them.
These small steps might seem insignificant but they are exactly the kind of details that take a cheesecake from good to absolutely perfect.
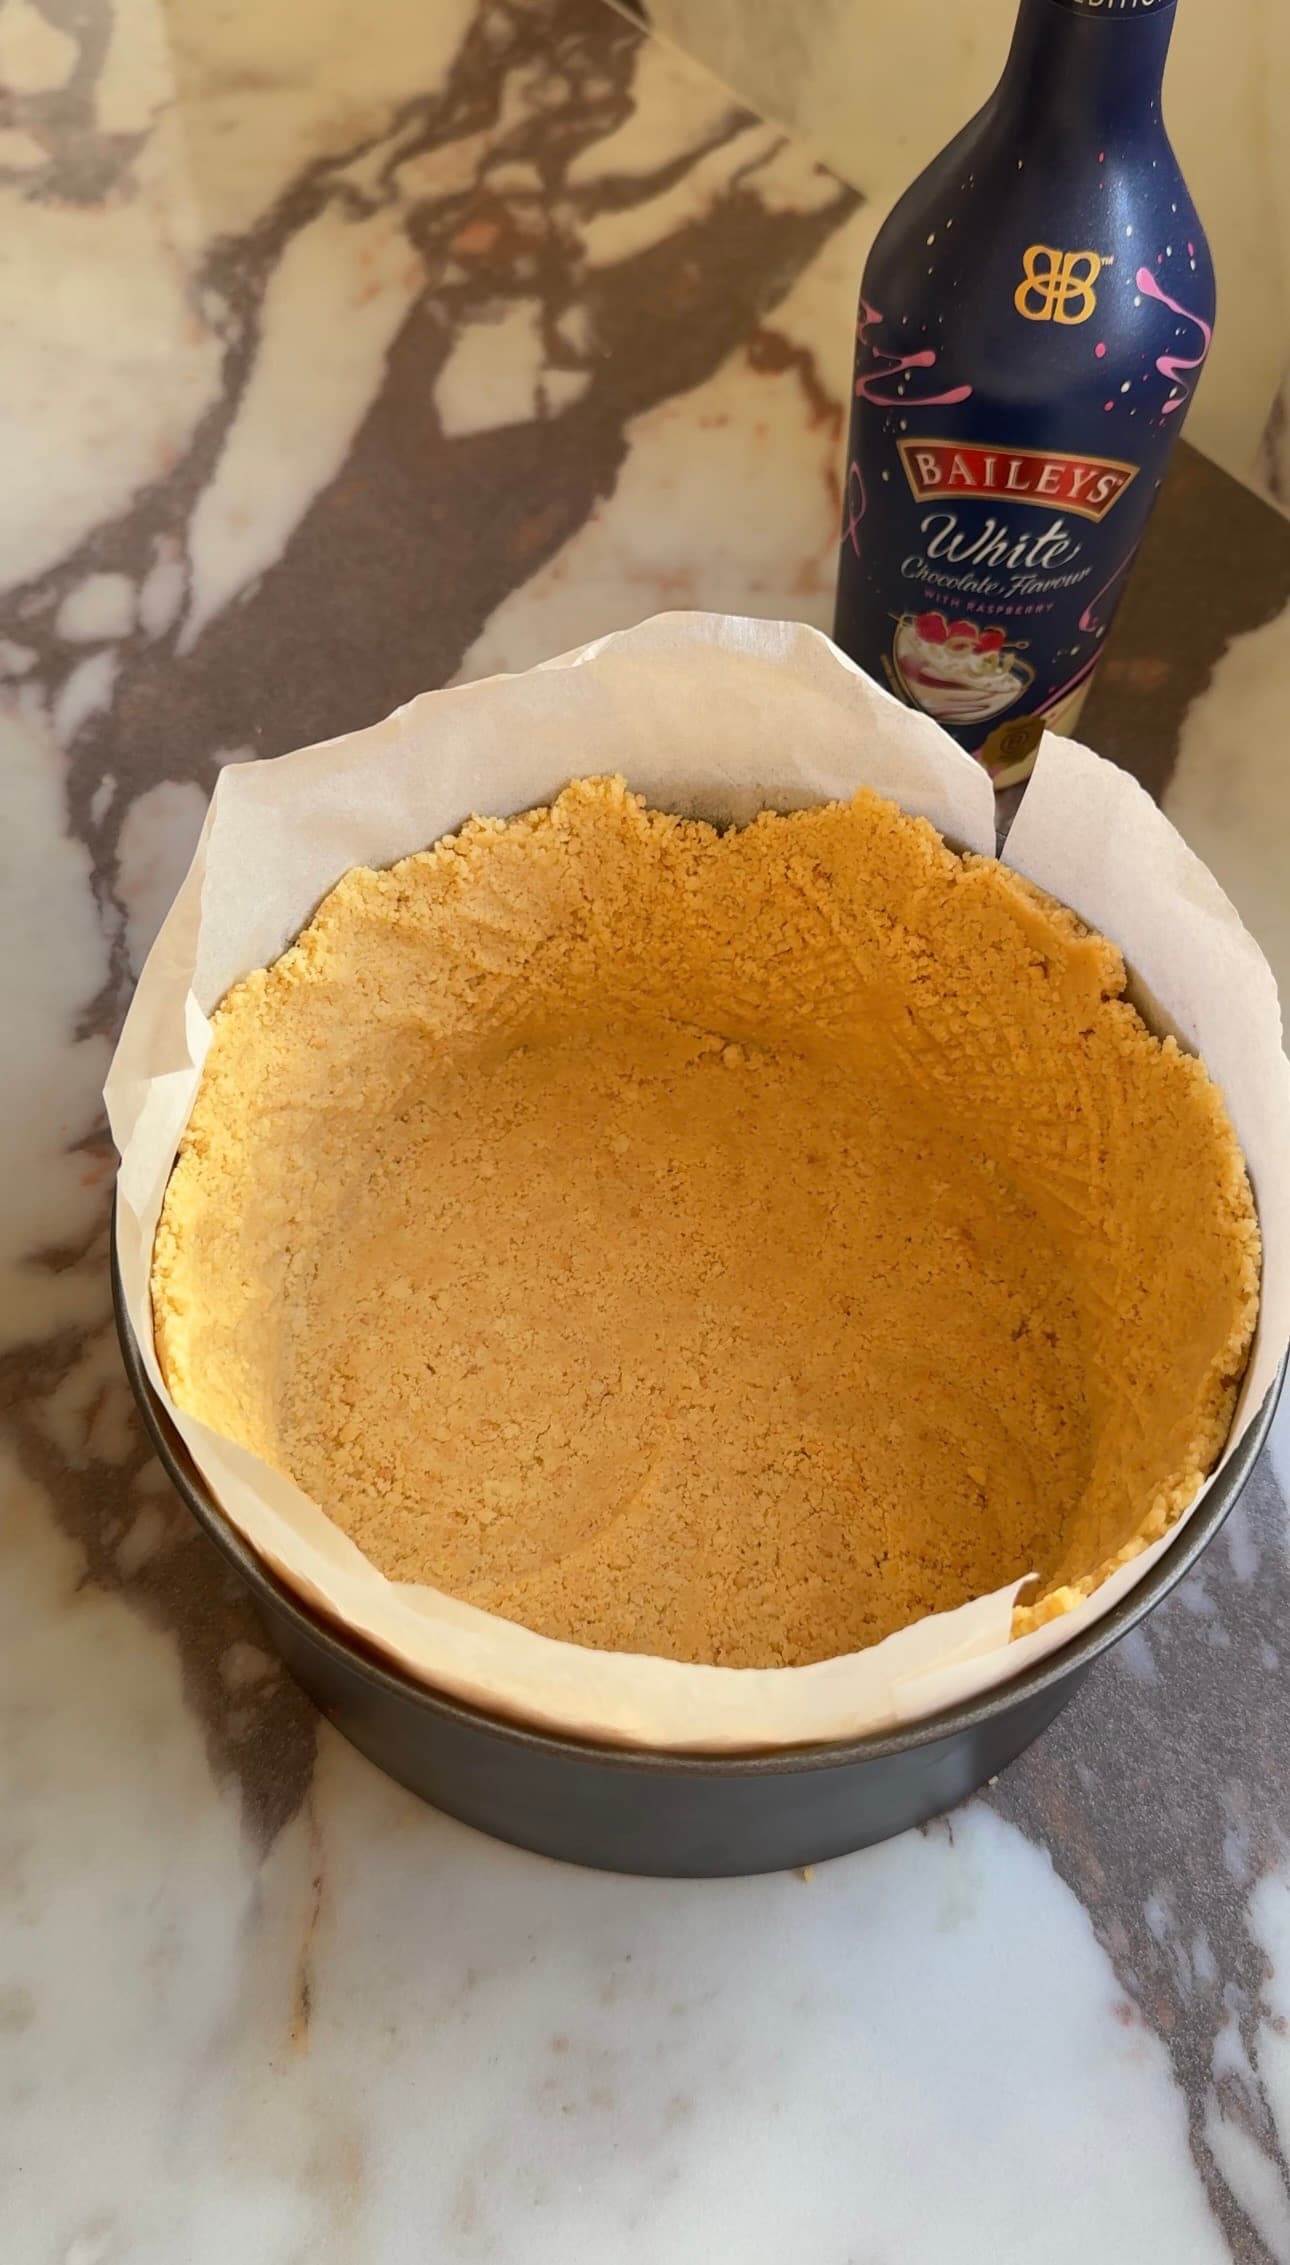
Another tip I always recommend is to line your cake tin properly.
Because this cheesecake has a biscuit base that comes all the way up the sides (which let’s be honest is one of the best parts), we want to make sure nothing sticks when we remove it from the tin. Lining both the base and sides with baking paper makes it so much easier to release the cheesecake cleanly once it has chilled.
Now here’s where my method differs slightly from traditional cheesecake recipes.
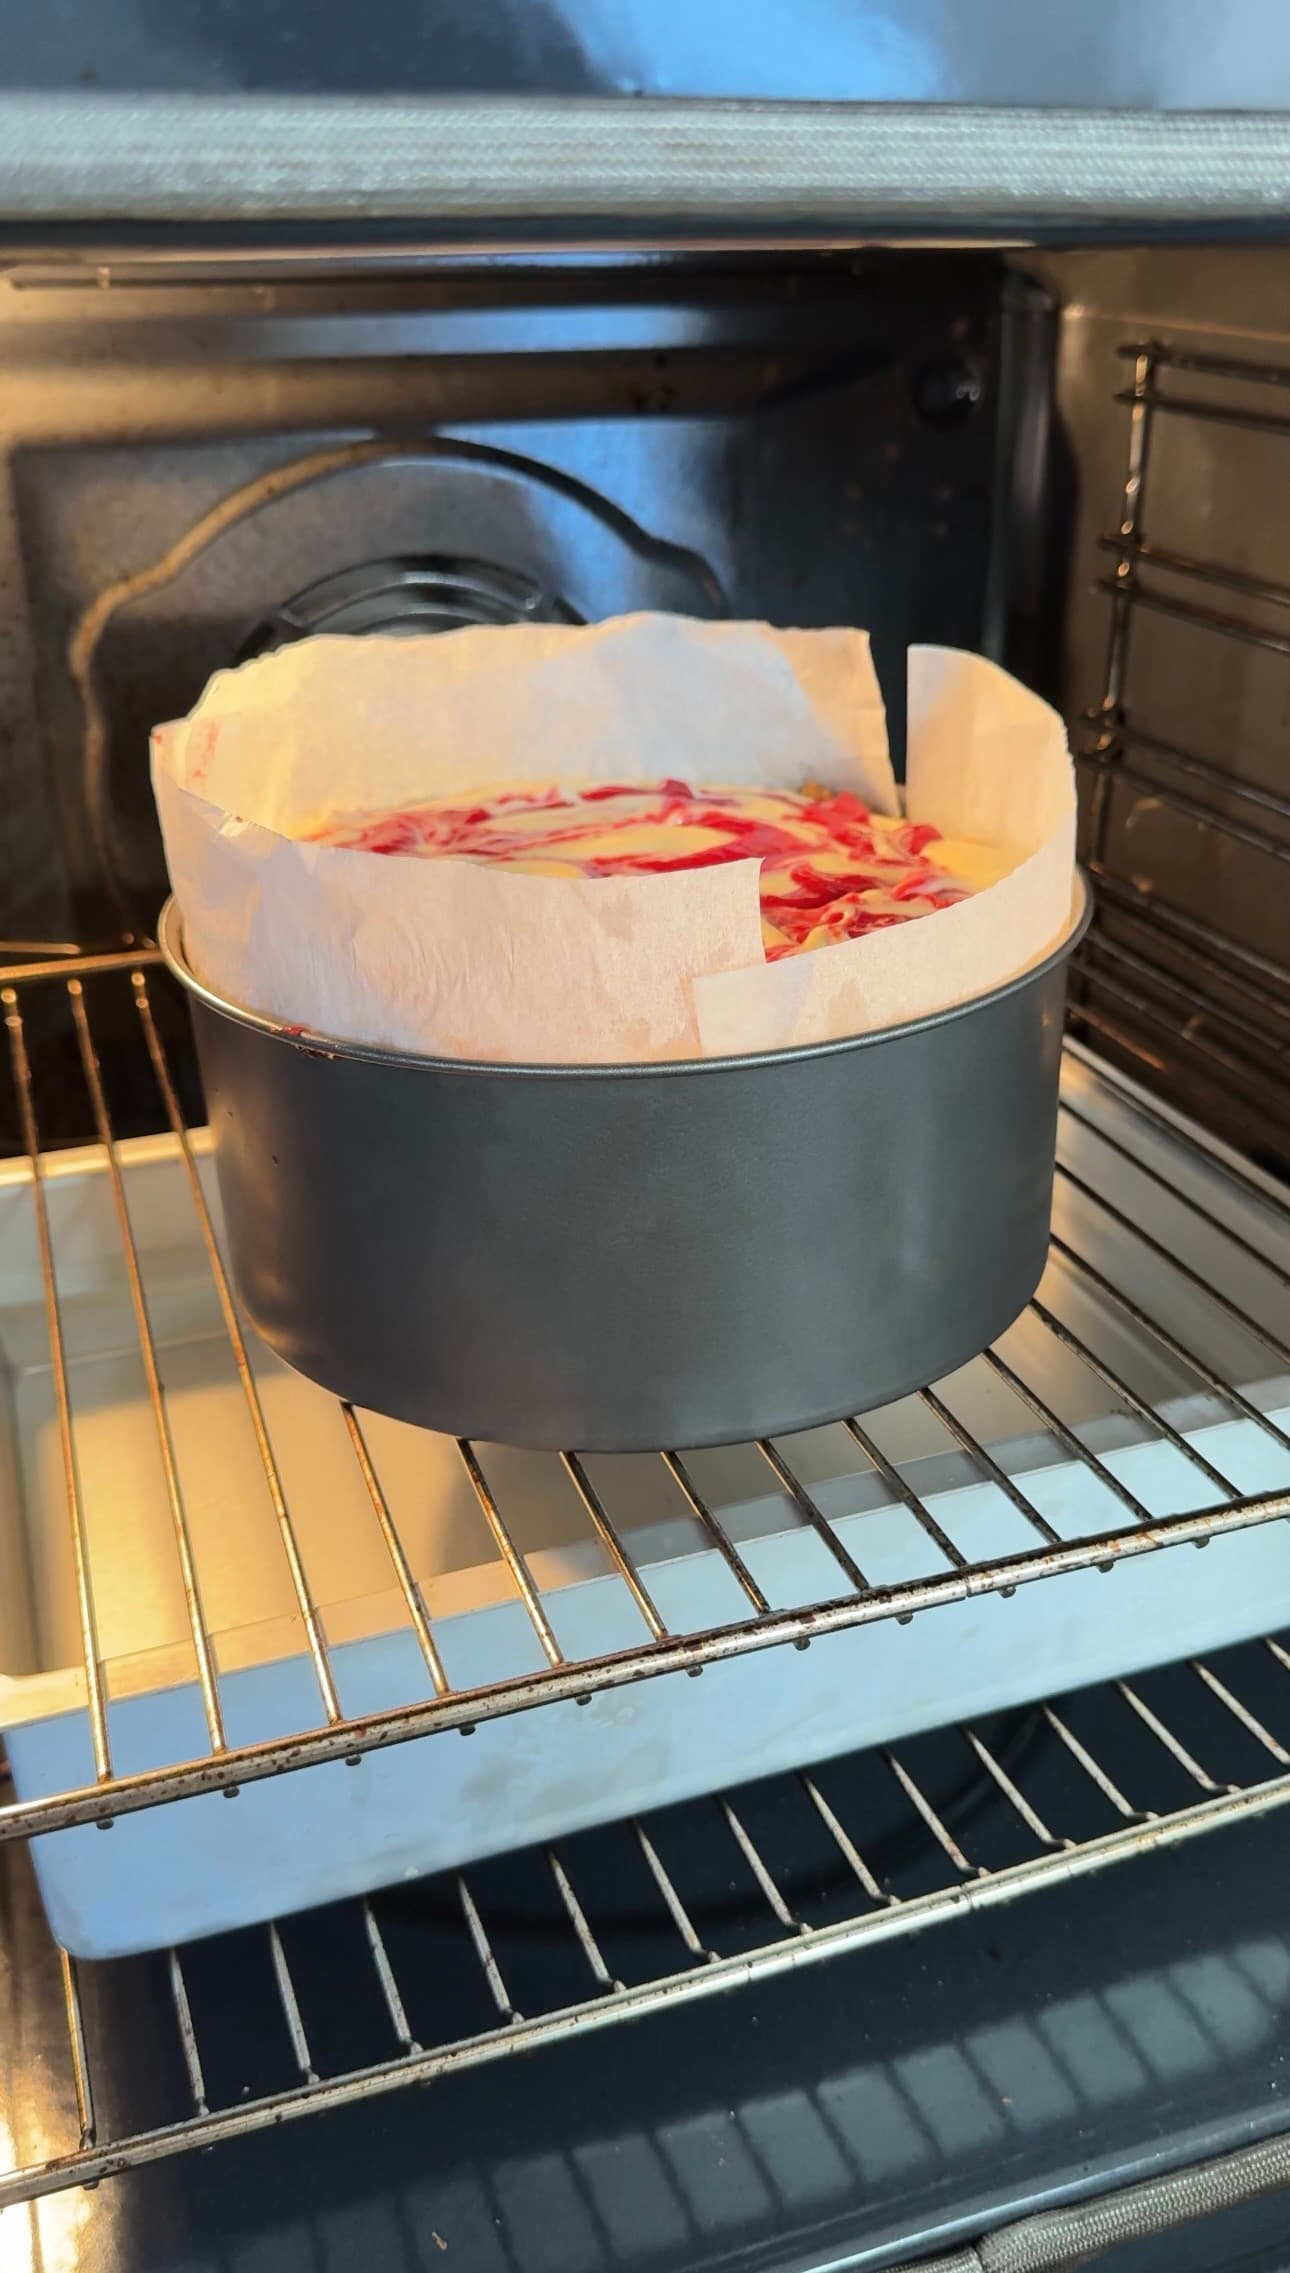
Most baked cheesecake recipes call for a water bath. The idea behind this is that the gentle steam helps regulate the oven temperature and prevents the cheesecake from cracking. Scientifically, the steam keeps the environment moist so the proteins from the eggs set slowly and evenly rather than overheating.
In theory it sounds great.
But in practice, every time I used a water bath I found the bottom of my cheesecake base ended up slightly soggy. And for me, a cheesecake needs a crisp buttery biscuit base.
So after testing this recipe multiple times, I came up with a slightly different approach.
Instead of putting the cheesecake tin directly into a water bath, I place a large roasting tray filled with hot water on the rack underneath the cheesecake. This still creates steam in the oven which helps the cheesecake bake gently and evenly, but it doesn’t allow any water to seep into the base.
You get all the benefits of a water bath without the risk of a soggy crust.
Honestly, once I started doing this I never went back.
The cheesecake bakes beautifully, the filling stays smooth and creamy, and the base remains perfectly crisp.
Once baked, the cheesecake needs time to cool slowly and chill properly. This is another step that requires patience but it’s essential for achieving that classic dense yet creamy cheesecake texture.
By the time you slice into it, you’ll have a perfectly set cheesecake with a buttery biscuit base, a rich white chocolate filling and bursts of sharp raspberry running through it.
It’s indulgent, balanced and incredibly satisfying.
So if you’ve been searching for the perfect baked cheesecake recipe, this might just be the one. And if you do give it a go, make sure to let me know how it turns out. I love seeing your bakes and hearing how the recipes work in your kitchens too.
Ingredients
Raspberry Purée
- 250g raspberries
- 1 lemon, juiced
- 1 tbsp cornflour
- 2 tbsp caster sugar
Biscuit Base
- 500g shortbread biscuits
- 75g unsalted butter, melted
White Chocolate Cheesecake Filling
- 250g white chocolate
- 825g full-fat cream cheese, room temperature
- 100ml double cream
- 250g sour cream, room temperature
- 200g caster sugar
- 4 large eggs, room temperature
Optional
- 50ml Baileys White Chocolate & Raspberry liqueur (optional)
Ingredients
Instructions
- Preheat the oven to 180°C and line an 8-inch deep cake tin with baking paper on both the base and the sides.
- To make the raspberry purée, add the raspberries to a saucepan along with the sugar, lemon juice and cornflour. Cook over a low heat, stirring occasionally, until the mixture thickens and the raspberries have broken down.
- Pour the mixture through a fine sieve, pressing it through with the back of a spoon to remove the seeds. You should be left with a smooth raspberry purée. Transfer to a bowl and place in the fridge to chill while you prepare the rest of the cheesecake.
- In a small bowl, add the white chocolate and cream and microwave in 30 second bursts, stirring between each burst, until fully melted and smooth. Set aside to cool slightly.
- For the base, add the shortbread biscuits to a food processor and blitz until they form fine crumbs. Pour in the melted butter and blitz again until the mixture resembles wet sand.
- Tip the biscuit mixture into the lined tin and press it firmly into the base and up the sides of the tin. Use the bottom of a large glass or cup to compact the crumbs, making sure the edges and base are tightly packed.
- Bake the base for 10 minutes, then remove from the oven and allow it to cool slightly.
- Reduce the oven temperature to 140°C. Fill a large roasting tray with hot water and place it on the bottom rack of the oven. Place another rack directly above it so the cheesecake will bake in the steam created by the water.
- To make the cheesecake filling, combine the cream cheese and sugar in a large bowl. Mix on a medium to low speed until smooth and fully combined.
- Add the eggs two at a time, mixing slowly between each addition until incorporated.
- If using, add the Baileys White Chocolate & Raspberry liqueur.
- Add the melted white chocolate mixture, double cream and sour cream, then mix on a low speed until smooth. Keep the speed low so you don’t incorporate too much air into the batter.
- Pour half of the cheesecake batter into the prepared base and smooth it out.
- Spoon over half of the raspberry purée.
- Add the remaining cheesecake batter, smoothing the top, then finish by spooning over the rest of the raspberry purée.
- Place the cheesecake into the oven on the rack above the tray of water and bake for 75 minutes.
- After 75 minutes, turn the oven off and open the oven door slightly. Leave the cheesecake inside the oven for another hour so it cools slowly.
- After the hour has passed, transfer the cheesecake to the fridge and refrigerate for at least 6 hours, but preferably overnight, before slicing and serving.

Hi, I'm Remi
Follow me on socials to stay connected!
Pin this Recipe
More like this


More recipes like this
Tempted by something else?


Work with me, or ask me a question!
I'm all about teaming up with cool new brands that align with my audience and make cooking awesome meals a breeze. Drop me a line, and let's cook up some exciting plans together!

Want free recipes and insider knowledge in your inbox?
Subscribe Below!